
Table of Contents
One of the key features that sets PayChute apart is the ability to offer support tiers, providing a customizable and rewarding experience for your community members. In this guide, we'll explore the steps to add, modify, and delete support tiers, empowering you to optimize your community's support structure and enhance your relationship with supporters.
Adding New Support Tiers
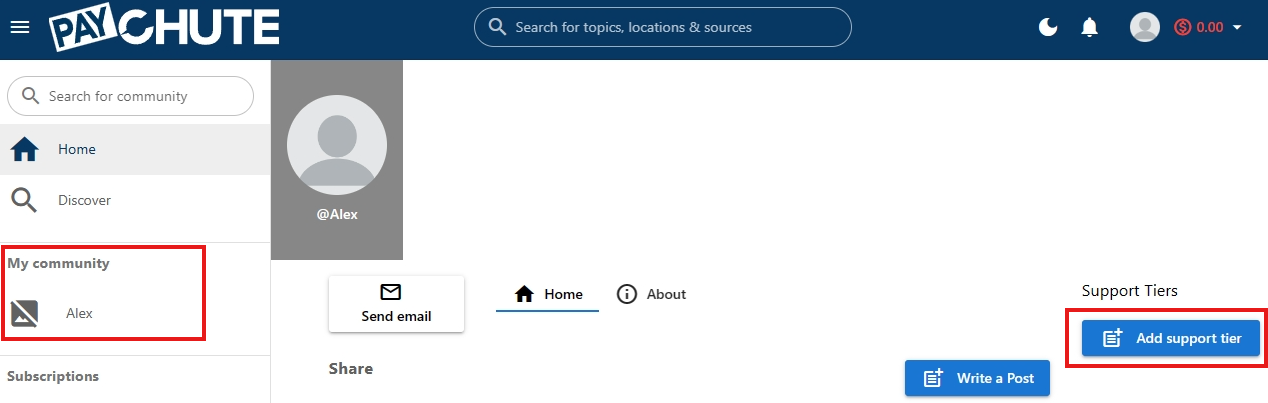
Log in to your PayChute account and navigate to My community and click on your community name.
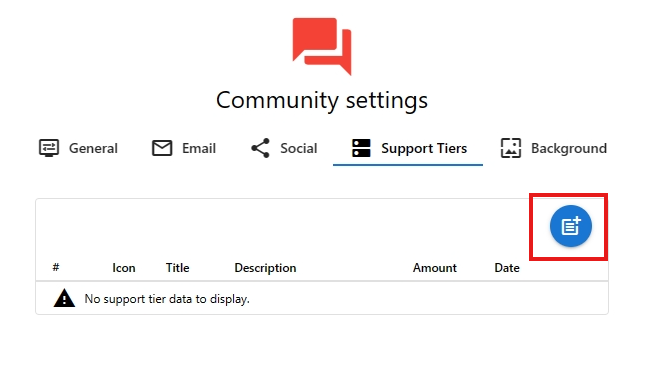
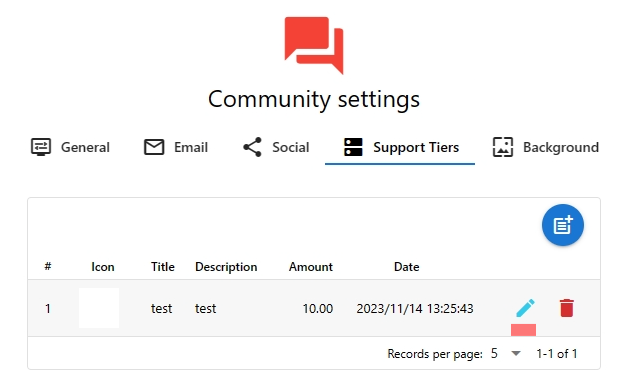
Find the "Add support tier" section on your dashboard and click on it. This will open the interface where you can view and manage your existing tiers or add new ones.
Look for the "Add Tier" button and click on it. This action initiates the process of creating a new support tier for your community.
Define Tier Details
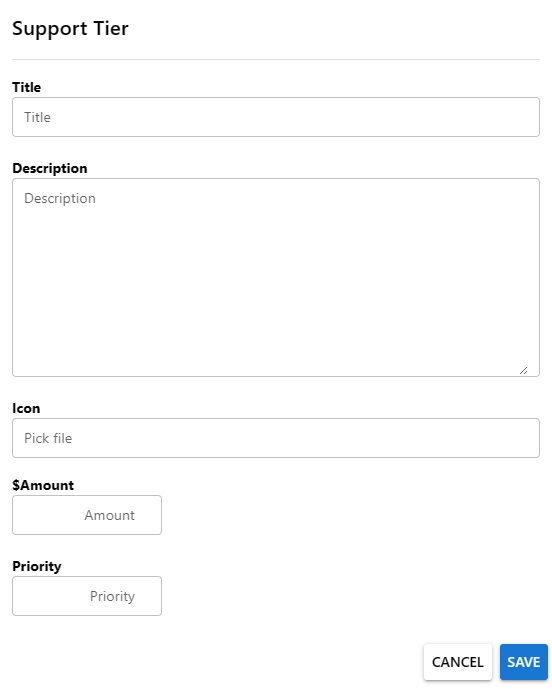
Provide details for your new tier, including the tier name, a distinctive icon, a compelling description, and the monthly contribution amount. Consider offering unique benefits for each tier to make them distinct and appealing.
Save and Publish
Once you've defined the tier details, save your changes and publish the new support tier. Your community members can now explore and choose from the updated range of support options.
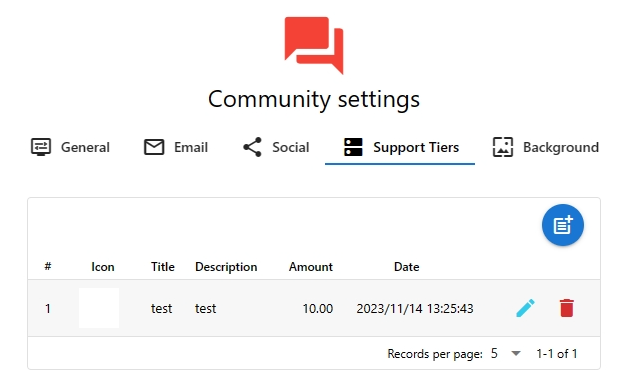
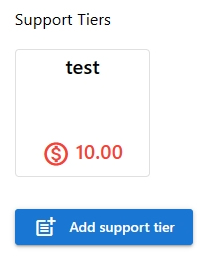
The new Support Tier will now be displayed on your Community page.
Modifying Support Tiers
Navigate to My community and click on your community name.
Find the "Add support tier" section on your dashboard and click on it. This will open the interface where you can view and manage your existing tiers or add new ones.
Identify the support tier you wish to modify and click on the pencil icon. This will open the tier details interface.
Make the necessary edits to the tier name, description, contribution amount, or access levels. Ensure that the changes align with your community's evolving needs.
Click save, these changes will be immediately reflected for both existing and new supporters at that tier level.
Deleting Support Tiers
Navigate to My community and click on your community name.
Find the "Add support tier" section on your dashboard and click on it. This will open the interface where you can view and manage your existing tiers or add new ones.
Identify the support tier you wish to modify and click on the trash icon. This will open the tier details interface.
Confirm your decision to delete the support tier. Once confirmed, the tier will be removed, and supporters at that level will be notified.

Pro Tip
Understand the diverse preferences of your audience and tailor your support tiers accordingly. Instead of a one-size-fits-all approach, consider creating tiers that cater to specific interests or demographics within your community.